Kiln Shed: Setting up the Unit
We last left off with starting the electrical. While waiting for the electrician to get back and finish his work, we had some work to do ourselves to prepare. First up was getting the computer portion of the kiln in place. And before that could be done, Jim had to build a shelter for it since it gets attached to the outside of the building.

This is from the other direction, with all the wires.

Here Jim is measuring for the two sides that will have doors for access using pressure treated plywood.

The purpose of the pink styrofoam is for insulation. Which of course had been saved from when the house was built, just sitting up on a shelf for +11 yrs, waiting for its new purpose. Once all sides were enclosed, a steel roof was attached to the top. Those pieces were leftover from when we put the roof on the shed.
With the computer portion enclosed, it was out to the kiln shed to install it in the center of the long wall closest to the workshop.
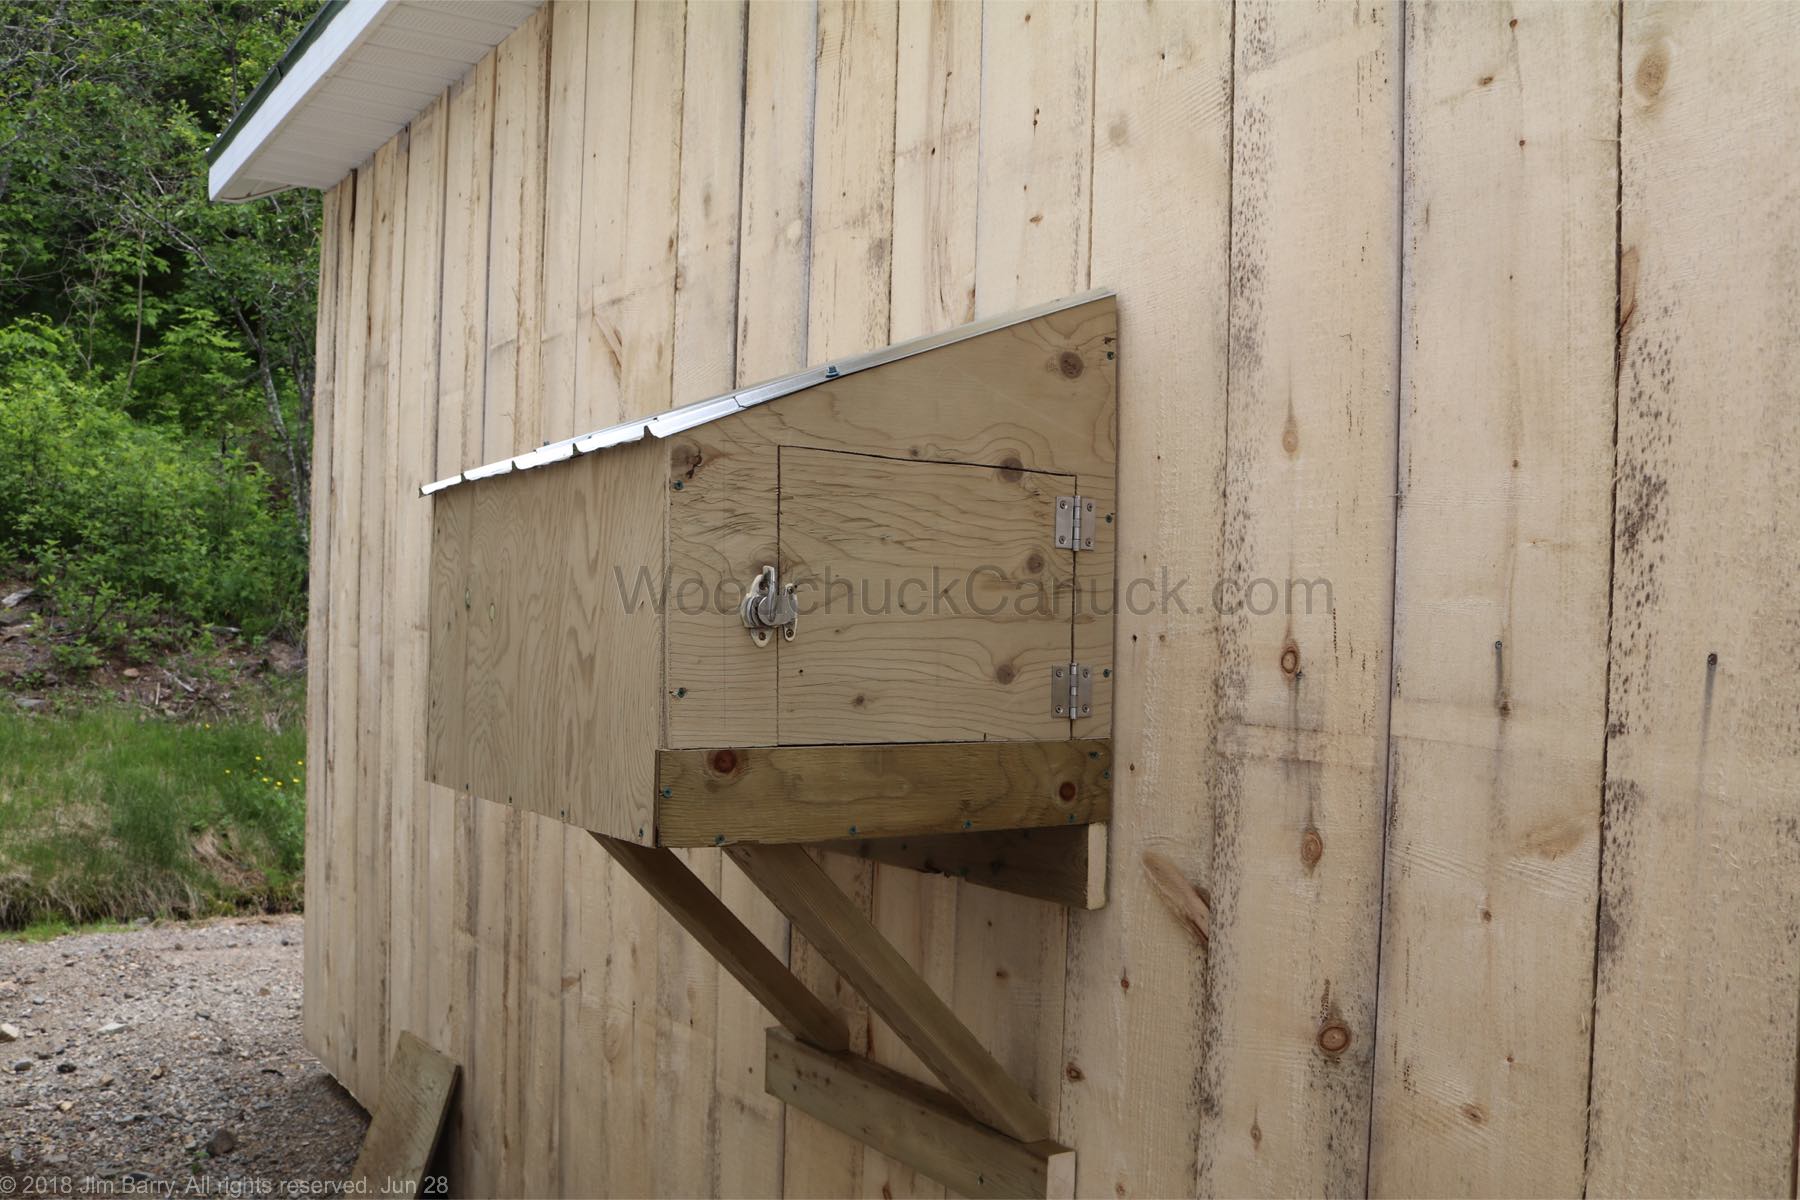
Jim is fast I tell ya. By the time I had a look, it was all installed.
Here is a peek inside. Both ends have a door like this.

And from a little farther away. We have deduced that we also need a man door, and that is going to have to go between the outside unit and the front corner of the building. But that will come a little bit later.

Now it was time to work on the inside. Jim said the instructions in the manual that came with the kiln were not very detailed. Thank God for the internet. Jim belongs to a group who have the same interest in kilns. Members either have already set one up or are thinking about it… or discussing it to death.
Now for this part I have no clue what he is doing. I can’t even fake it. I’ll let him explain.
Hi folks. Jim here.
First order of business is to feed the wires from the controller box in through the kiln bldg.
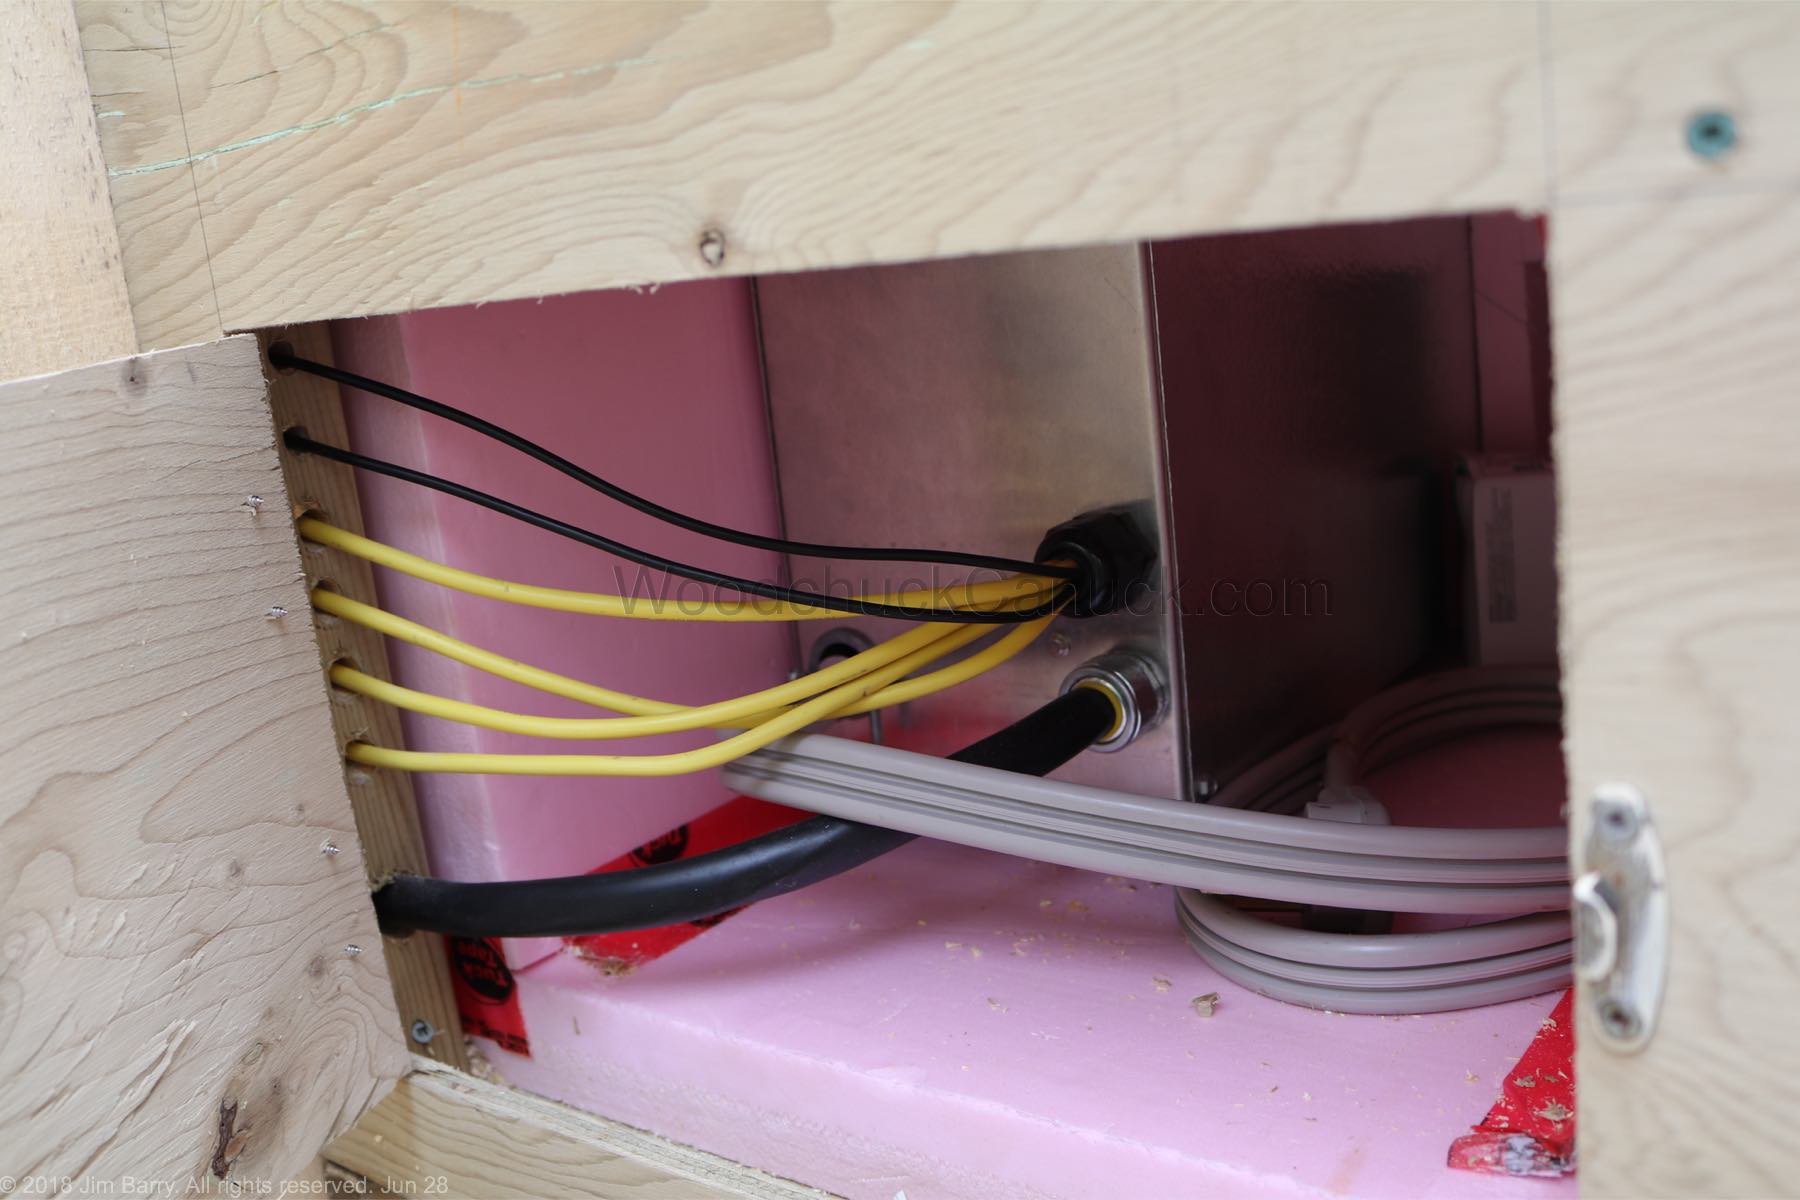
The four yellow wires are for monitoring moisture in the lumber that is being dried. The thick black wire connects to the kiln unit (big silver looking box). Its actually a commercial dehumidifier with the added option of heating elements to heat treat the lumber. More on that later.

Next is the placement of the dry bulb and wet bulb. Basically they read the temperature in the kiln. The dry bulb is just that, it measures the dry air. The other is similar but its temperature probe is covered with a wet wick. So it reads the temperature differently. That difference is what the computer figures out and adjusts the controls for drying.

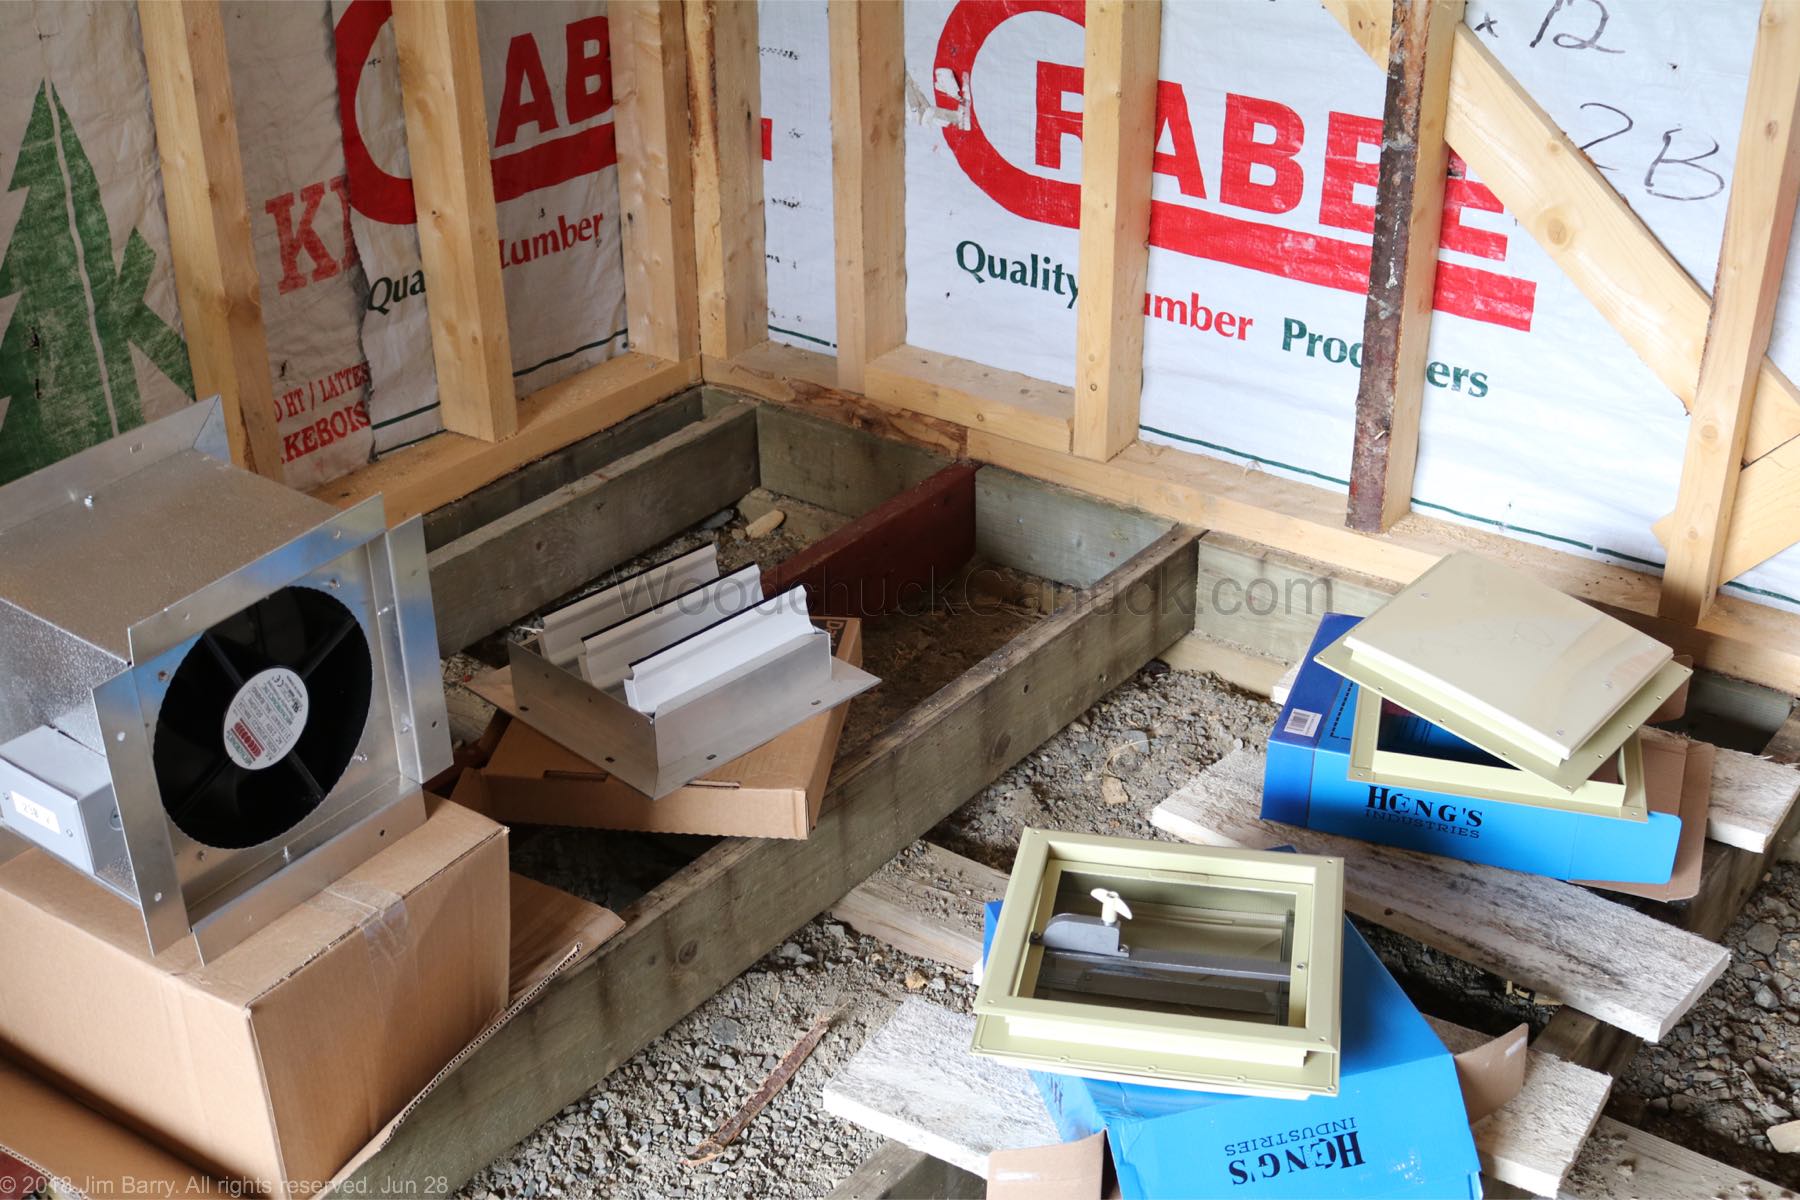
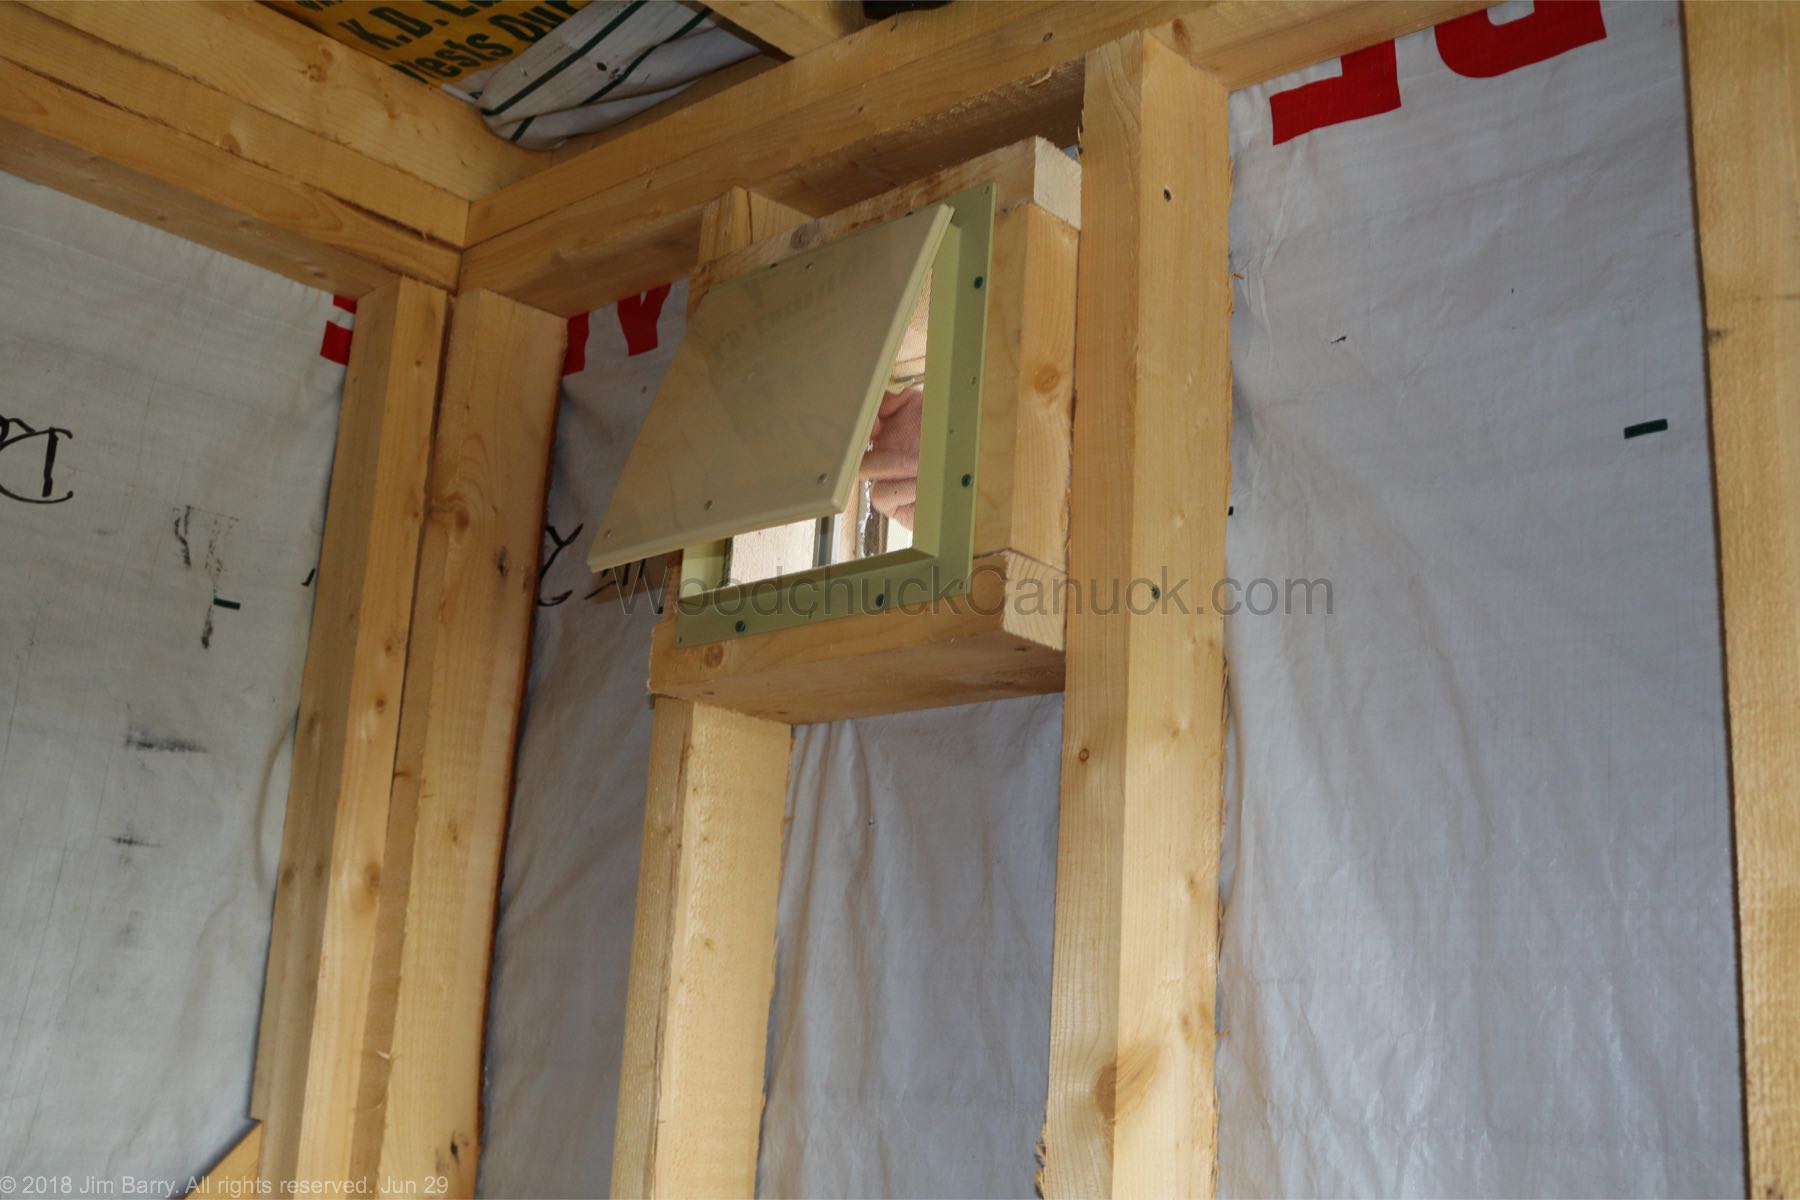
Now we move onto the vents. There is a power vent (silver box) which is turned on automatically if the temperature in the kiln gets too warm. When on, it pulls the warm air out of the kiln until the temperature is back on track. The other two smaller vents are much the same sort of vent you would find in a camper or greenhouse. They are opened manually to draw cool air into the kiln as necessary.
This is the power vent installed, interior view.
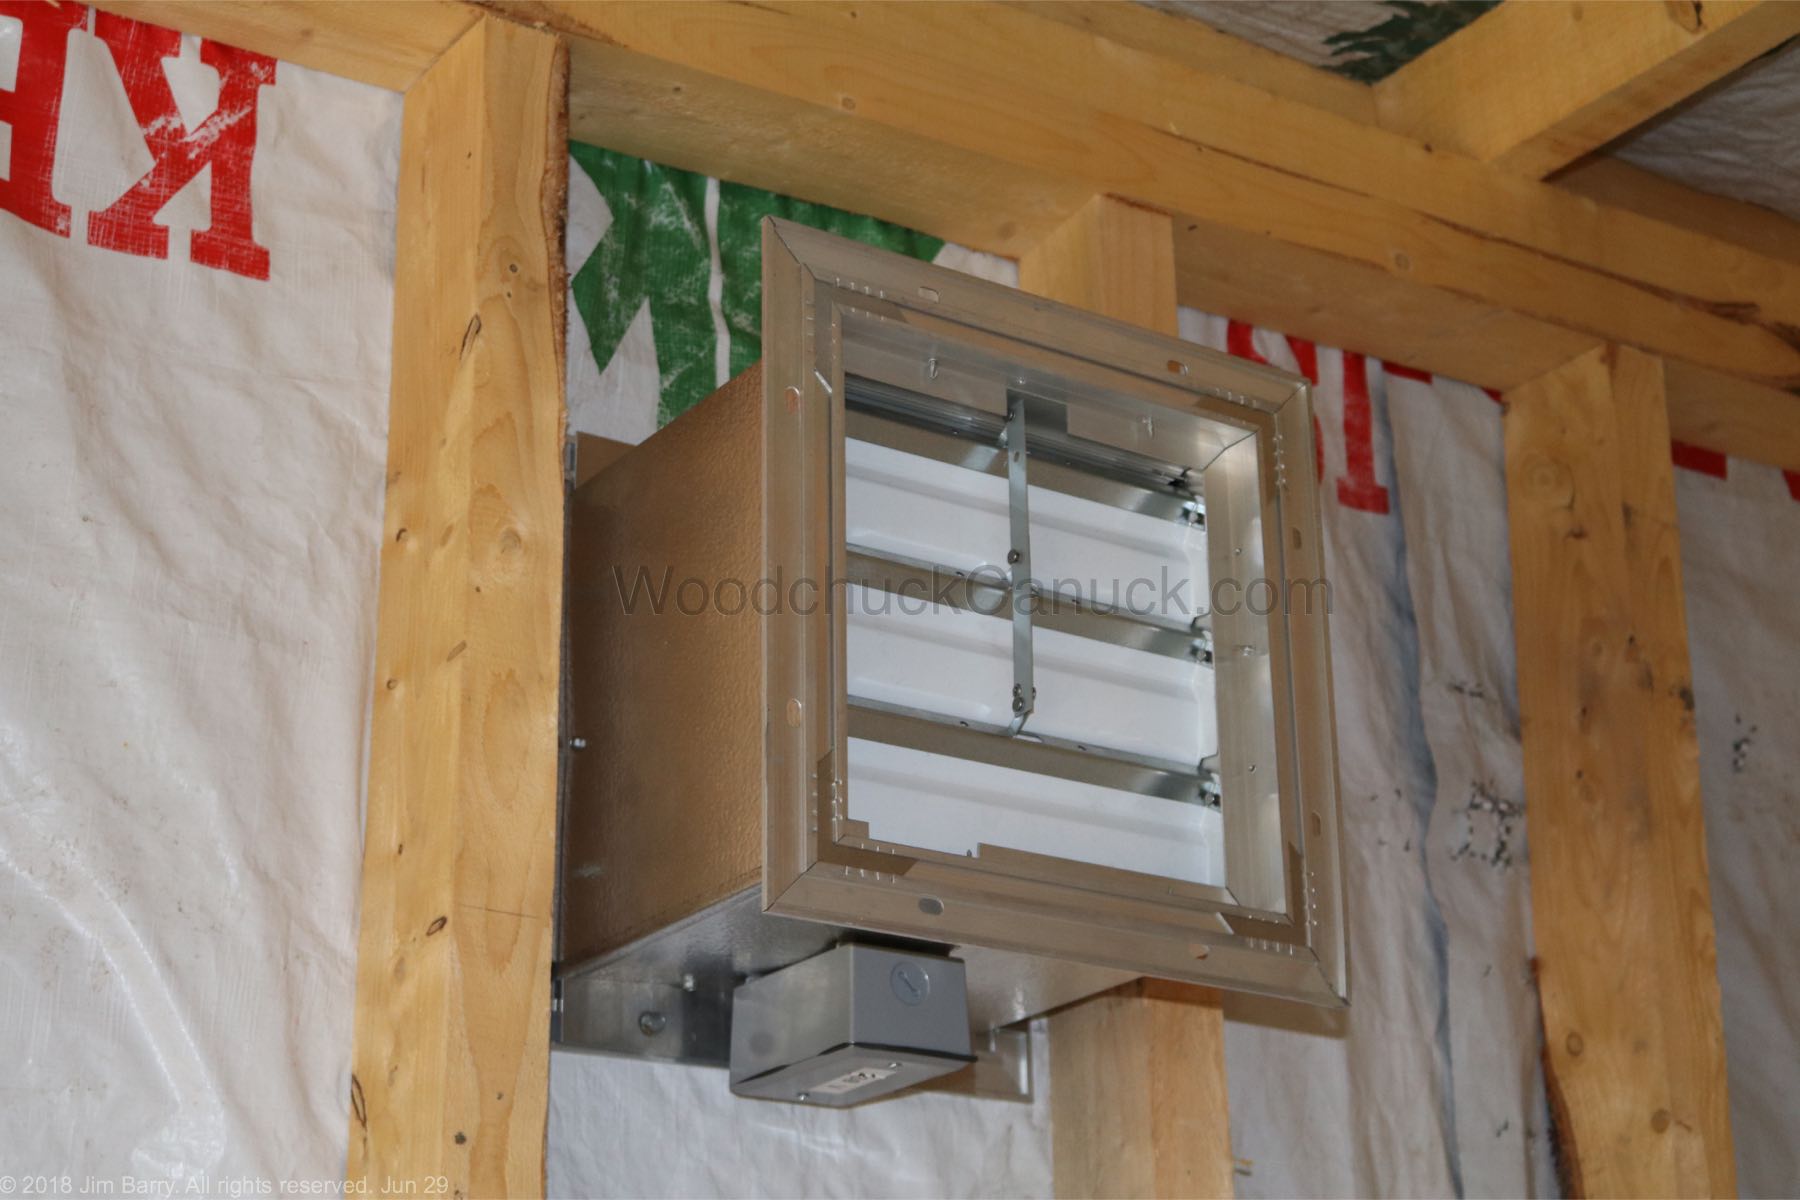
I’ll probably have to build a weather shield for it on the outside.
Here is what the manual vents look like installed. I actually installed them opposite from what was recommended. I figure it will be easier to open/close them from outside, rather than having to squeeze by the stacks of lumber when I have to open them.
The next bit of work is to get the dehumidifier higher up off of the floor and then to start on the overhead fan units. A simple table is all that is needed to rest the dehumidifier on. Once built, Gina and I managed to lift the unit onto the table. It wasn’t pretty. This thing is HEAVY.
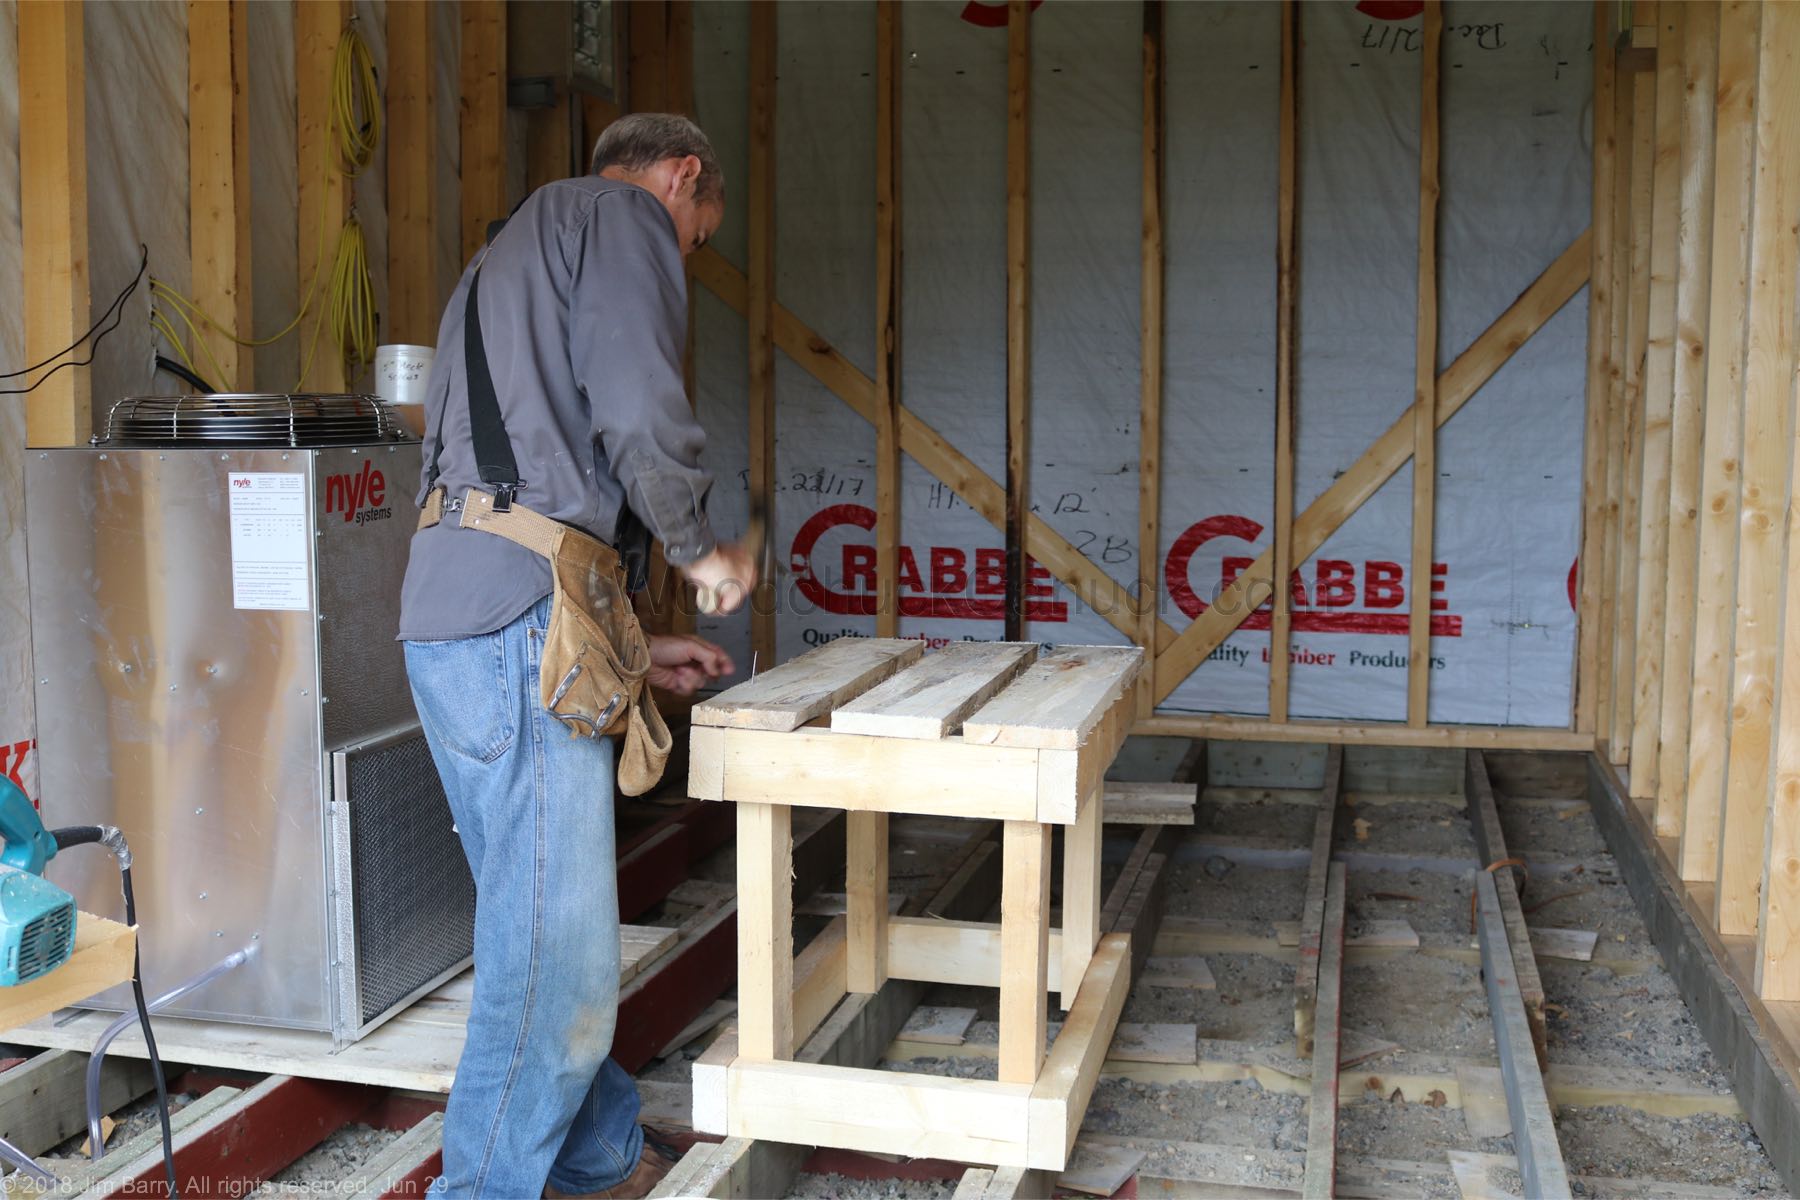
The overhead framing is going to hold the three air circulation fans. I put them up in three sections for a couple reasons. First, its easier to put up three smaller sections rather than one large 20 ft long frame. Second, it will be easier to perform maintenance later on when necessary. Always thinking ahead.

Up next is to install the overhead fans, finish the electrical and then to start on the doors.
If you have any questions, feel free to add them below.
……..Told you he could explain it better. Actually that’s exactly what I was going to say.
Have a great weekend!
Later
You May Also Like
