Toy Soldier #128

The elves are progressing on their next Christmas project, the Toy Solider. The downloadable pattern is now available to purchase in our online store.

The very first step is to print out the pattern and loosely assemble so you can see how it all goes together.

Next is to tape the pages together, aligning the pages to make the complete pattern.

Using carbon paper, we traced the lines to a scrap piece of plywood and cut around the outside. Its at this stage that you could decide to go a different route. If you are not that great a painter, what you could do is cut out all the little pieces of the pattern, like the eyes, nose, buttons, belt, shoes, etc and paint them separately. Then attach them with glue. We don’t mention that on the plan but I was thinking about it as we were painting this one. So its an option.

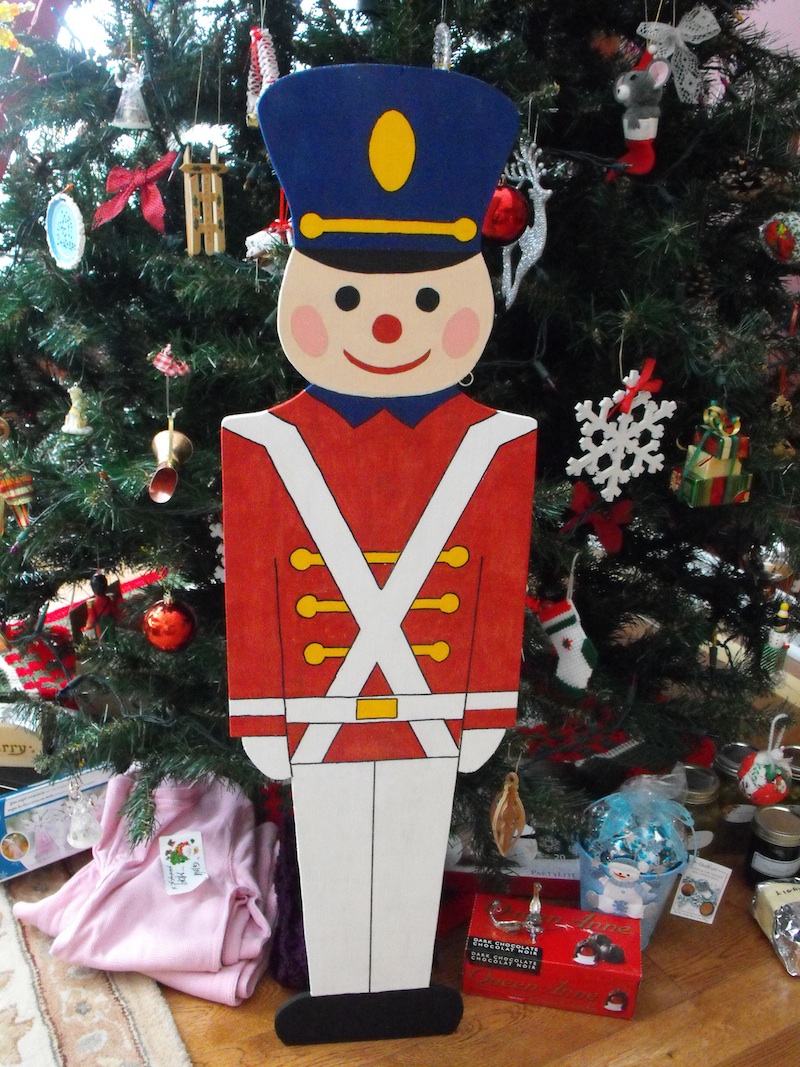
The painting begins. The dark colours only needed one coat. The red is one coat, we might do two coats. It depends on what style of decoration we want it to be, either shiny with bright colours, or a more primitive style that looks worn and aged through the years.

The white will need at least 2 coats and the gold for the buttons will need at least three. The buttons on the coat will be gold, maybe I will do a base coat of white before starting with the gold colour.
All done. The gold needed a couple of coats. The black lines were done with a permanent marker.
You May Also Like
