Jiggin’ for Salmon – Forest Leaf Salmon Plywood Project
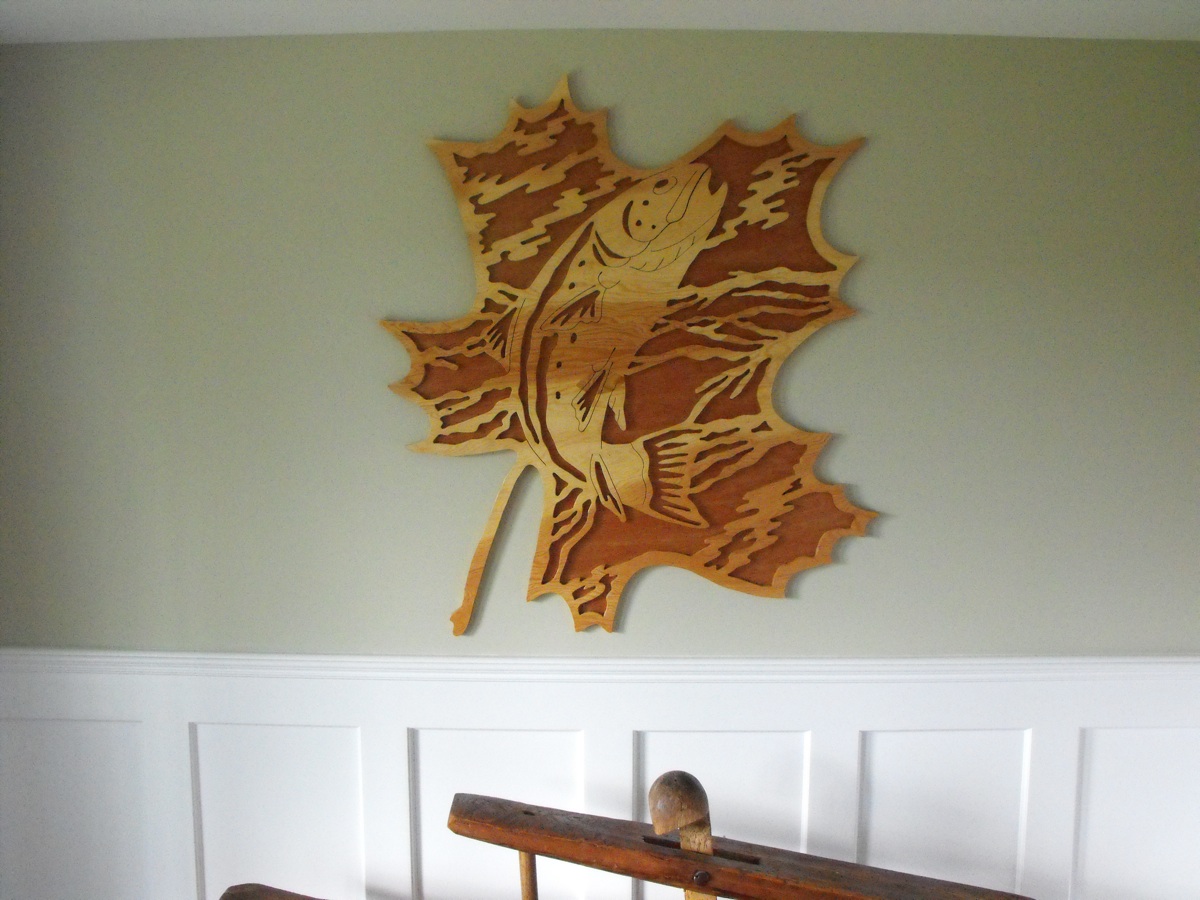
From scrollsaw to jigsaw… working with a normal 8.5 x 11 inch scrollsaw pattern to produce a large scale Forest Leaf project.
The Mission: To convert scrollsaw patterns to jigsawing patterns.
The Total Cost: $26 materials
Total Time: 13 hrs
The Process: To enlarge the scrollsaw pattern as is and see if there is any difficulty in cutting the same pattern with a jig saw using a scrolling blade.
Sep 16 (1 hr) First we resized the Forest Leaf – Trout pattern to fit onto a half sheet of plywood. Our printer prints on 36 inch wide roll paper so the pattern has to be sliced. Not a big deal, simply cut along the edge and tape the pattern together.

Next we orientate the pattern onto the plywood based on what we feel will look good. Its a personal choice.

Next we slip the sheet of tracing paper we have on hand under the pattern and start tracing. I used an old pen since the ball tip pint easily rolls over the paper. Its a sheet that is 24×48 so its not quite enough to cover the full pattern. So I tape the pattern to the plywood in a couple spots. This prevents it from moving while I trace. When I get to the spot where the transfer paper stops, I took a straight edge and marked a line down the pattern. In the photo you can see the lines transfered to the plwood. Now I know where to stop and start.
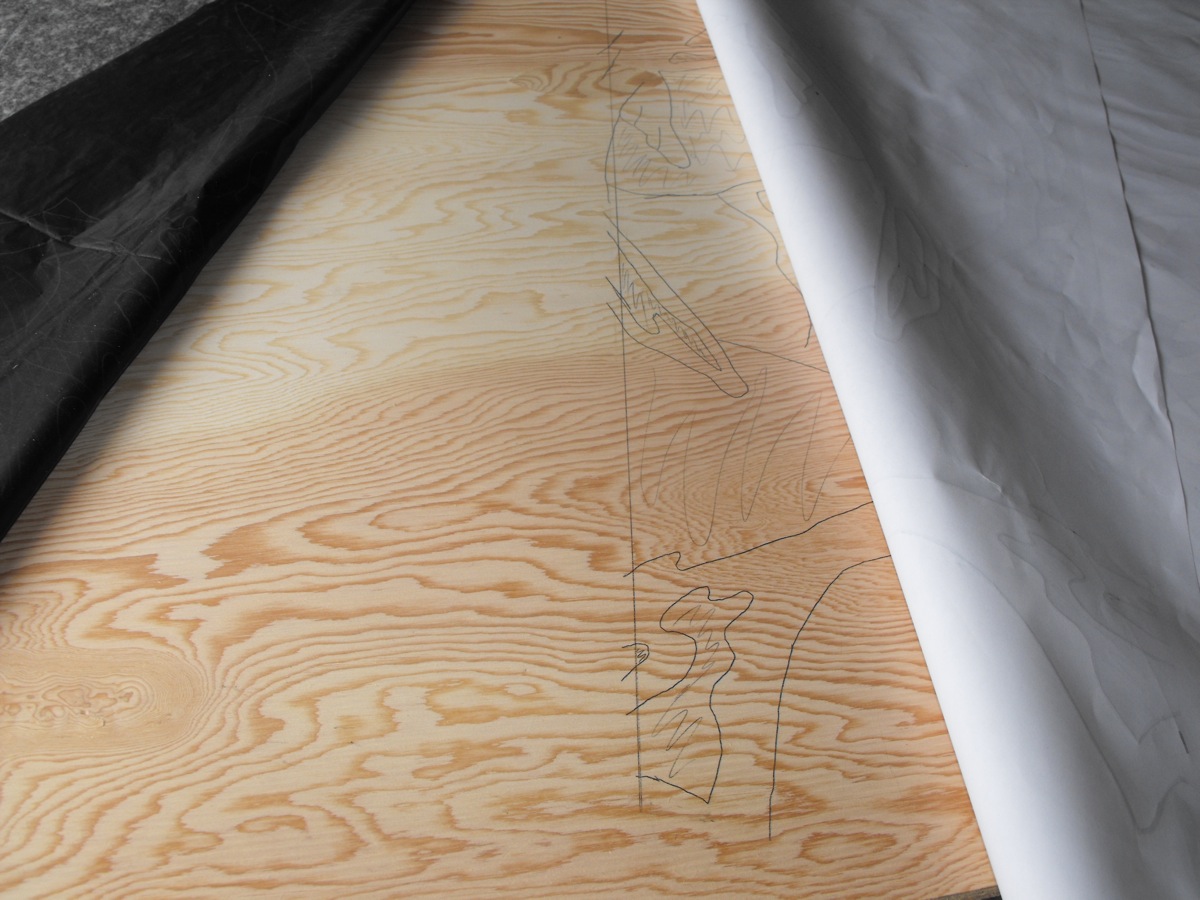
Next I re-position the tracing paper to that straight line.

Next I drop the pattern back down and finish tracing. Notice in the picture that I marked squiggly lines in the grey areas. Its the grey areas that get cut out, so as I mark each space, I squiggle a line to show I’ve marked that area.

Now all the tracing has been done and I show the pattern on the plywood. It was at this point I got to see where any of the plywood veneer patches show up in the pattern. Almost dead center there is a oval patch and I suspect I might have some trouble cutting there.

Now is time to look at preparing to cut. First we have to start with drilling holes to fit the saw blade. Not much different that scroll sawing. Drill holes at high points and low points or where ever you feel that the jig saw blade needs to make a tight turn. Its not necessary to drill right to the trace line since its your jig saw that cuts to the line. The holes are simply to allow access and in some instances, allow relief for the pressure that can occur when making a tight turn.

With the dust brushed away we get to see what the access holes look like.

Here I am accessing near a corner and will start cutting along that long line. Notice above I just finished cutting the fish fin.
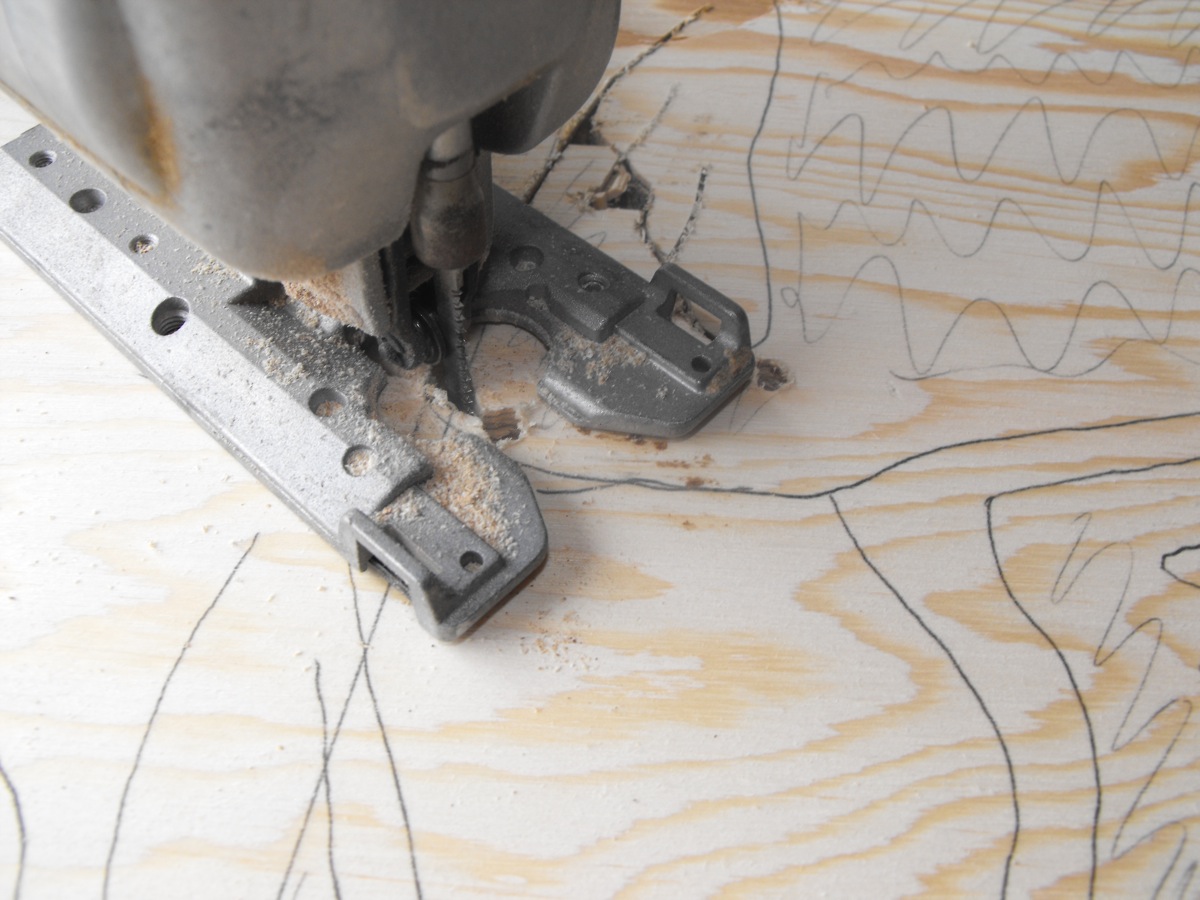
I started working in the middle of the pattern, simply thinking that it would be easier to work my way out from the pattern as opposed to cutting my way in. At least this way I will always have a solid surface to lean on while working.